Note: This is an old article. However, the basic concepts may still apply to newer versions.
Introduction
The remote control is a small system tray application that enables you do a remote execution of a TX project without the need to install the full client. We like to call it "the CEO button", since the simple interface allows execution with a single click.
If you would like an easy way to execute a project on a local machine, consider running TX with parameters.
Prerequisites
The remote control uses the multiple environments feature of TX for remote execution. As such, you need to have the feature as a part of your license and have a server environment running.
System tray icon state
The remote control appears as a led light icon in the system tray (next to the clock in the Windows taskbar). The icon will appear in one of the following colors depending on the state of the program:
- Green: Application is ready or the last execution was successful
- Yellow: Project is being executed.
- Red: An error occurred during last execution.
Step by step
-
Locate TXRemoteControl.exe in the TX folder - C:\Program Files\TX2014 Server\TX2014 Server version\ - and start the program. If, for some reason, the file is not there, you can download the TX Remote Control here.
- Optional: Create a shortcut to the .exe in a convenient place, e.g. the desktop or the start menu. Or right click the .exe, drag it to Start -> Startup and choose Create shortcuts here to have it start up when the user logs in.
-
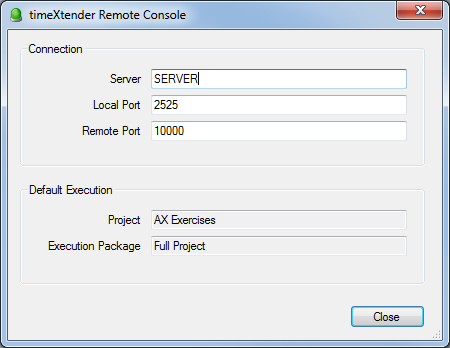
Right-click the icon in the system tray and choose Settings. In the settings dialogue, enter your server connection settings. The settings will match those of an environment configured and running in the TX server service. Click Close when you are done.

-
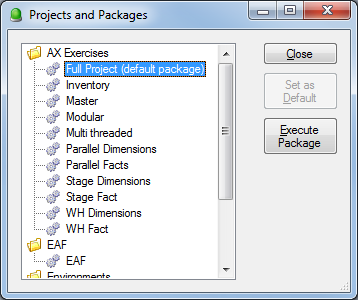
Right-click the icon in the system tray and choose Projects and Packages to display the list of projects and execution packages available on the server. Select a package and use the Set as Default button to choose a default package for execution. Click Close when you are done.

-
Right-click the icon in the system tray and click on Start update to execute the execution package selected as default above. This will connect to the server, load the project and execute the execution package. While the package is executing, the led will change to yellow and subsequently into green or red, depending on the success or failure execution.
Troubleshooting:
If the Server service is unable to run, you may get this error in the Event Viewer Application log:
Service cannot be started. System.Exception: No local environment has been defined with a valid LocalPort setting
at TxServer.TxServer.OnStart(String[] args)
To resolve this, review the "Prerequisites" section near the beginning of this article.
This article applies to: timeXtender 4.5, tX2012, TX2014. Last updated: 2014-04-01.


5 Comments