Using the ODX
In the Discovery Hub architecture, the ODX - Operational Data eXchange - is where data comes in from sources. In TimeXtender, the ODX layer is implemented as a stand-alone server that is optimized for handling very big amounts of data. In this chapter, you will learn how to set up and manage an ODX server.
The Structure of an ODX
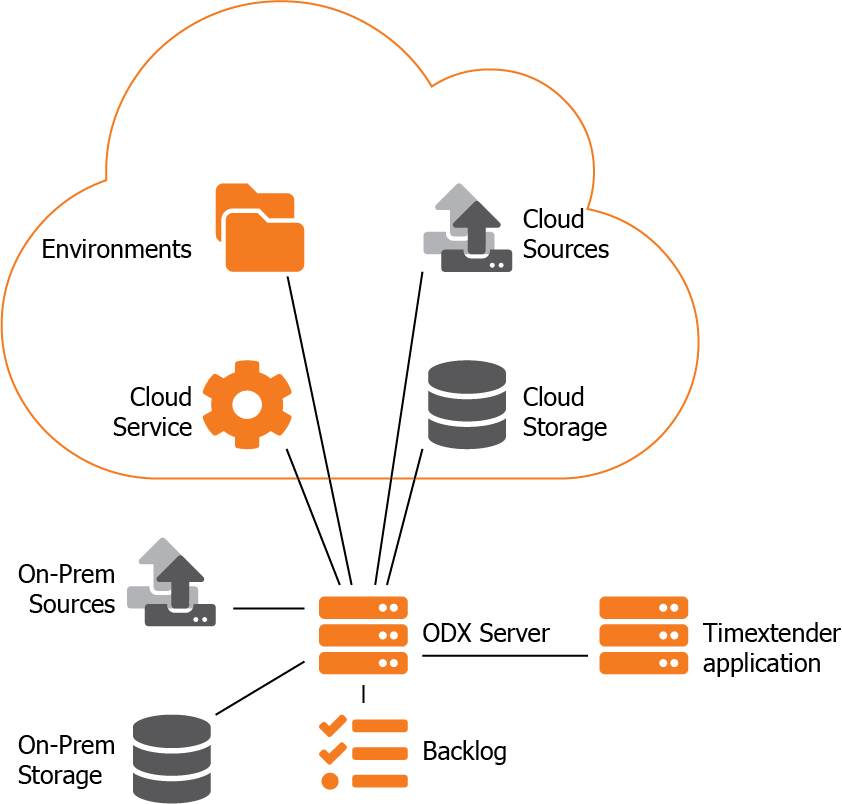
The illustration below illustrates the different parts that make up the ODX part of the TimeXtender architecture.

The ODX server sits in the middle of it all and copies data from data sources to a data storage, which can both be on-premise or in the cloud, and, when requested by TimeXtender, on to modern data warehouses.
For storing meta data about sources and storages as well as the tasks it needs to run, the server uses a local backlog that is continuously synced with the environment (project) in the cloud. Each ODX server is connected to one environment at a time and two ODX servers should never use the same environment at the same time.
The environments are not tied to a specific license. Instead, each company has a number of environments managed by TimeXtender. The default amount is two, one for production and one for use as a sandbox. The ODX server gets the information it needs to connect to the cloud repository from the cloud service.
ODX is a client/server solution. The server runs as a service with no GUI. Once initial setup has been completed, you manage the ODX server through the TimeXtender application that can be installed on the same or a different machine.
Installation of the ODX server is covered in the next section, followed by sections on adding data sources, tasks and security, execution and the administrative aspects of managing the ODX.
To learn more about using data from the ODX, see Copying Data from an ODX to a Data Warehouse.
0 Comments