Note: There is an updated version of this article, which applies to the next generation of TimeXtender.
Data Selection and Filtering
The ODX allows you to select data on two levels - the data source and the transfer task.
On the data source level, you select the data that should be available for tasks to transfer to data storage. This means filtering out the tables, columns and rows that would never be useful in the ODX storage and data warehouses. For instance, your data source might contain temporary or system tables that only make sense for the source system or very old data that are never accessed or relevant for reporting.
Data selection on the transfer task level gives you control over exactly what tables are transferred when and how. For instance, you could schedule bigger tables for both daily incremental loads and weekly full loads while full-loading smaller tables every day.
Note: The ODX philosophy differs from schools of data warehousing that put emphasis on only copying the tables and columns that are actually used in a report. When using an ODX, the recommendation is to copy all relevant data from data source to ODX data storage. 'Relevant data' is any data that is not obviously irrelevant. In other words, if you are in doubt, include it.
As hinted above, the data selection is more fine-grained on the data source level than the task level. See the table below for an overview.
| Data source | Transfer task | |
|---|---|---|
| Table level | Selected tables are available for transfer from the data source. | Selected tables are transferred to the data source. |
| Column level | Selected columns are available for transfer from the data source. | Tables are transferred with the columns and rows selected on the data source level. |
| Row level | Rows of data can be filtered out for all or specific tables. |
On all levels, data selection in the ODX is based on rules.
- On the table and column level, you can create "include" and "exclude" rules. Exclude rules always take priority over include rules. If the same table is matched by both an exclude and an include rule, the table will not be available or transferred. Per default, a "catch all" include is added to select everything, but if there are no include-rules, no data will be available on the data source or transferred by the task.
- On the row level, the rules include rows of data that match specific schema, table and column values. Per default, all rows from a table is included, i.e. if you don't add any rules, all rows from all selected tables are transferred.
Adding a Table Selection Rule
To add a rule for selecting data, follow the steps below.
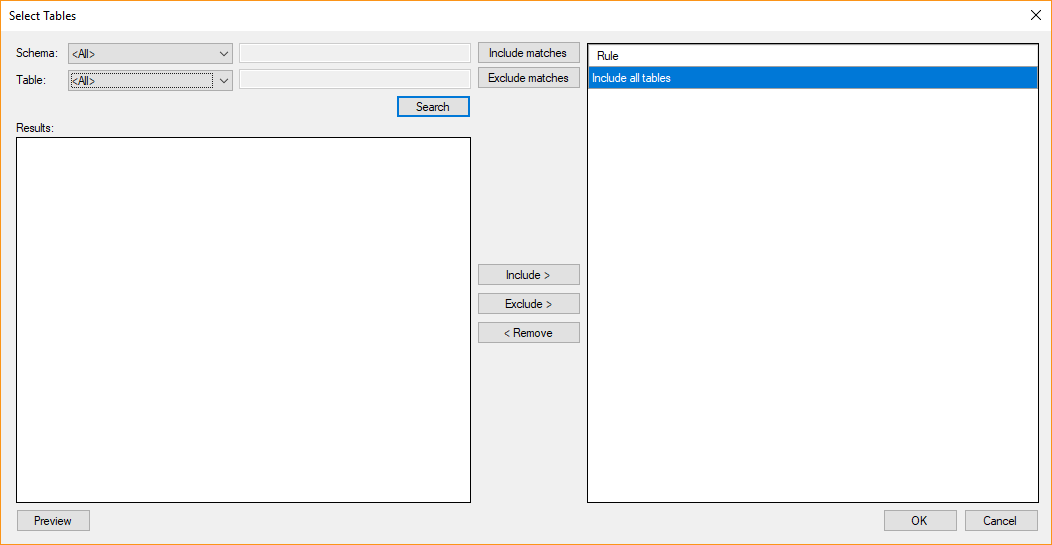
- Right click on the data source or task and click Select Tables...

- Click Search to show tables matching the conditions.
- Click Include Matches or Exclude Matches to include or exclude tables matching the search conditions. This kind of rule will "catch" any new tables in the data source that match the conditions, not just the tables in the Results list. Select one or more tables in the Results list and click Include > to add these specific tables to the list of available tables or Exclude > to exclude them from the list.
Adding a Column Selection Rule
To select the columns that should be available for transfer from the data source, follow the steps below.
- Right click the data source and click Select Columns...
- Enter Schema, Table and Column conditions and click Search to show tables matching the conditions.
- Click Include Matches or Exclude Matches to include or exclude tables matching the search conditions. This kind of rules will "catch" any new tables in the data source that match the conditions, not just the tables in the Results list. Select one or more tables in the Results list and click Include > to add these specific tables to the list of available tables or Exclude > to exclude them from the list.
Adding a Row Filter Rule
As mentioned above, all rows of data are transferred from a table unless you add a row filter rule that matches the table. The rule defines the criteria a row needs to have to be included, e.g. an ID over a specific number or a timestamp later than a specific date.
To filter out rows of data from transfers, follow the steps below.
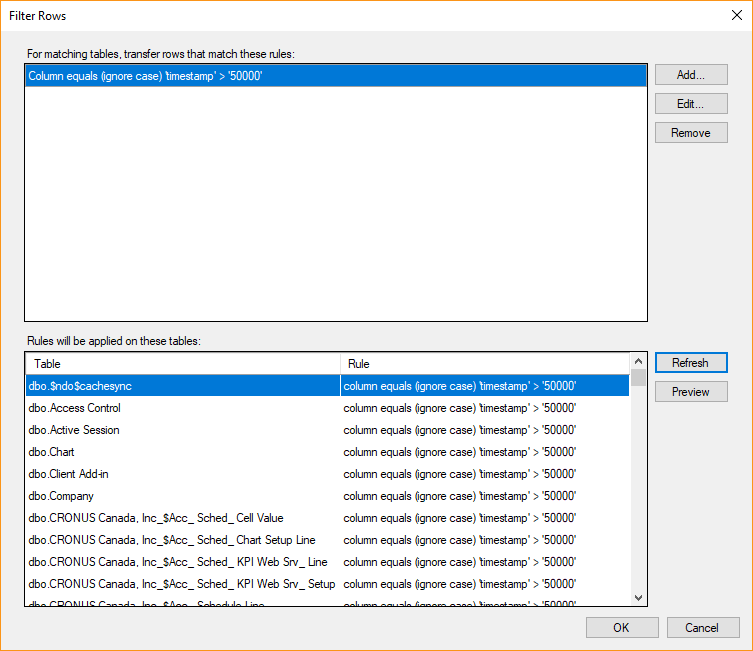
- Right click the data source and click Filter Rows...

- Click Add... to add a new rule.
- If you want the rule to apply to specific tables, enter the schema and/or table names that they need to match. In the Schema/Table list, click on the operator you want to use and type text to match in the box.
- Click Add to add a new column and value combination. In the Column list, click on the operator you want to use and type the text to match in the box. In the Value list, click on the comparison you want to use and enter a value in the box.
- Click OK to add the rule.
- (Optional) In the Filter Rows window, click Refresh to see a list of affected tables. Click Preview to open the query tool with a preset query to see what rows will be transferred from a specific table.
0 Comments