Note: There is an updated version of this article, which applies to the next generation of TimeXtender.
Endpoints
Your semantic models can have a number of endpoints. At the time of writing, TimeXtender supports three different endpoints: Qlik, Tableau and Analysis Services Tabular.
Adding a SSAS Tabular Endpoint
To add a Tabular Endpoint, follow the steps below.
- Expand the model you want to add an endpoint to, right click Endpoints and click Add Tabular Endpoint. The Add Tabular Endpoint window appears.

- In the Name box, enter a name for the endpoint.
- In the Server box, type the name of the Tabular server. The server can be on-premise or in Azure.
- In the Database box, type the name of the database.
- In the Deployment target list, click the version of SSAS you are targeting. Automatic(default) or Analysis Services Universal are the recommended settings.
Note: Analysis Services 2016 and later versions are supported. - In the Compatibility box, click or type the compatibility level you want to use, or leave it blank to use the highest supported by the server.
- Under Server login, the following settings are available:
- Use Windows/Microsoft authentication: Uses the credentials of the user executing the endpoint.
- Use authentication login: Uses the credentials of a specific user or an App Registration (if the SSAS server is on Azure). This can be useful when you SSAS server is on Azure and the user executing the endpoint has two-factor authentication enabled, which will be triggered by an execution. Enter the user name for the user in the Username box and the corresponding password in the Password box. Prefix the username with 'app:' if it is an App Registration application key.
- Under Processing, you can set how the Tabular service will connect to the data warehouse.
- For authentication, the default is to use the SQL Server Analysis Services service account. Click Use Windows user to use another user and then enter the user name for the user in the Username box and the corresponding password in the Password box.
- Select Process model offline to process the model "behind the scenes" and make the deployment seamless for the users. The offline database will have the endpoints name prefixed with "Offline_".
- Click OK to add the endpoint.
Adding a Qlik Endpoint
To add a Qlik endpoint, follow the steps below.
- Expand the model you want to add an endpoint to, right click Endpoints and click Add Qlik Endpoint. The Add Qlik Endpoint window appears.
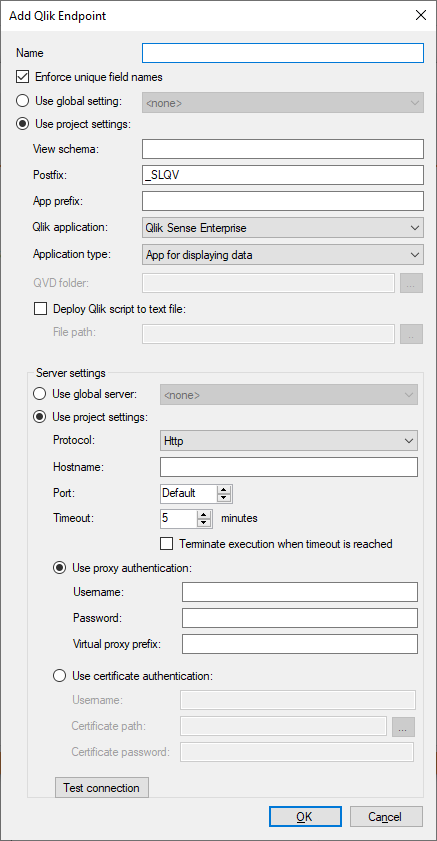
- In the Name box, enter a name for the endpoint.
- (Optional) Clear the Enforce unique field names checkbox if you don't want TimeXtender to ensure that field names are always unique across tables by prefixing the name with the table name on deployment.
- (Optional) In the View schema box, type the schema name you want to use for the views generated by TimeXtender.
- (Optional) In Postfix box, type the postfix TimeXtender uses for views, folder names etc.
- (Optional) In the App prefix box, type a string to be prefixed to the endpoint name to create the app name used in Qlik Sense.
- In the Qlik application list, click on the Qlik application to target. You have the following options:
- Qlik Sense Enterprise: Use a Qlik Sense Enterprise server. When you chose this application type, you need to enter server connection information under server settings.
- Qlik Sense Desktop
- QlikView
- If you are deploying to Qlik Sense Enterprise or Qlik Sense Desktop, click on the app type you want to create in the Qlik Sense app type list. You have the following options:
- App for generating QVD file: Creates an app that generates a QVD file with data from the model in the QVD folder you specify. The QVD folder should accessible for both TimeXtender and Qlik Enterprise.
- App for displaying data: Creates an app and loads data from the model into it.
- Select Deploy Qlik script to text file and enter a path in File path to have TimeXtender output the script it generates to a text file.
- If you are deploying to Qlik Sense Enterprise, enter settings under Server:
- Type the your server's hostname in the Hostname box.
- Type the port to connect to in the Port box if it is different from the default. The defaults are 4747 if you use certificate authentication, 80 if you use proxy authentication with HTTP and 443 if you use proxy authentication with HTTPS.
- (Optional) In the Timeout box, enter the timeout you want to use in communication with the server.
- Select Terminate execution when timeout is reached if you want TimeXtender to terminate - kill - an execution when the timeout is reached. This is useful in rare cases where executions will not terminate by themselves.
- Click Use proxy authentication if you are using the proxy authentication method to authenticate with the Qlik Sense Enterprise server. Type your username in the Username box and your password in the Password box. Write the prefix from the virtual proxy in Qlik Sense in the Virtual proxy prefix box.
-
Click Use certificate authentication if you are using the certificate authentication method for authenticating with Qlik. Type your username in the Username box, enter the path to the certificate in the Certificate path box and the associated password in the Certificate password box.
- Click OK to add the endpoint.
Adding a Tableau Endpoint
To add a Tableau endpoint, follow the steps below.
- Expand the model you want to add an endpoint to, right click Endpoints and click Add Tableau Endpoint. The Add Tableau Endpoint window appears.
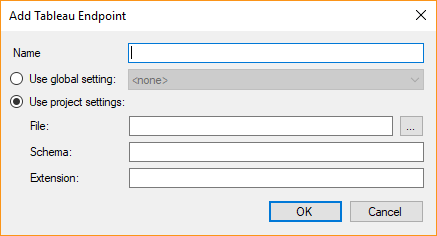
- In the Name box, enter a name for the endpoint.
- In the File box, enter the path and file name for the Tableau data source file generated by TimeXtender.
- (Optional) In the Schema box, type the schema name you want to use for the views generated by TimeXtender.
- (Optional) In the Extension box, type the postfix TimeXtender uses for views etc.
- Click OK to add the endpoint.
Deployment and Execution
Deploying and executing a semantic model means deploying and executing the endpoints on the model. All endpoints can be deployed, but not all endpoints need to be executed. Your options will vary accordingly.
To deploy a model or endpoint
- Right click the model or endpoint, click Deploy, Execute or Deploy and Execute and click Start in the Deploy and/or Execute window that appears.
What happens during deployment and execution depends on the endpoint.
SSAS Tabular Endpoint Deployment
On deployment, the model is created on the SSAS Tabular server. To get data in the model, you need to execute the model as well.
Qlik Endpoint Deployment
For Qlik endpoints, the end product is a QVD file for each table in the model. QVD is a proprietary data format that stores data in the way that gives the best performance in Qlik apps. Since only Qlik applications can create QVD files, deployment and execution of Qlik endpoints create apps or scripts that a Qlik application can use to create QVD files.
Data for the QVD files is extracted from views. On deployment, a view for each table in the model is created in the data warehouse or staging database that house the table. The view name depends on the settings on the endpoint and has the format [view schema].[table name]_[postfix], e.g. "QView.Customers_QV".
Apart from creating the views, deployment is different depending on your choice of Qlik application:
- Qlik Sense Enterprise: An app called "[Endpoint name]_QVDApp" is created on the server. Unlike the other Qlik applications, Qlik Sense Enterprise has an execution step. On execution, the app on the server is executed and creates QVD files on the file path specified.
- Qlik Sense Desktop: You can right click the endpoint and click Create Qlik Sense Appto create an app in the application. When you execute this app in Qlik Sense Desktop, it creates QVD files based on the tables in the semantic model on the file path specified.
- QlikView: You can right-click the endpoint and click QlikView Scripts to show and copy the script you need to use in QlikView to generate QVD files based on the tables in the semantic model.
Tableau Endpoint Deployment
On deployment, a view for each table in the model is created in the data warehouse or staging database that house the table. The view name depends on the settings on the endpoint and has the format [view schema].[model name]_[endpoint name]_[table name]_[postfix], e.g. "Tableau.MyModel_MyTableau_Customers_tab".
In addition to that, a TDS file is created on the file path specified in the endpoint. Use this file in Tableau to connect to the views.
Validating a Semantic Model or Endpoint
You can run a validation on a semantic model or endpoint to catch issues that would case problems in the front-end after deployment and execution.
To validate a semantic model or endpoint, follow the steps below
- Right click a model and click Validate Model
- OR -
Right click an endpoint and click Validate Endpoint.
If the validation results in warnings, the Validate Semantic Model or Validate Semantic Endpoint window appears.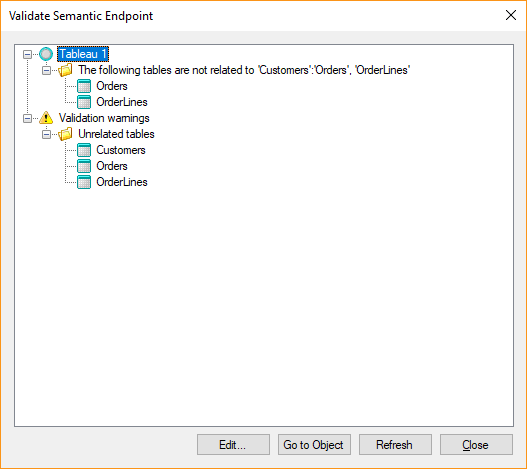
- To help you fix the warnings, the window contains some shortcuts for each item in the list:
- Click Edit... to edit the selected object
- Click Go to Object to reveal the selected object in the tree.
- Right click an object and click Delete if you want to delete the object.
0 Comments