It is possible to create a specific ODBC provider, however it is not always giving the correct tables and fields back. This can be due to specific escape characters or other things. It should always be done as a solution if it does not work.
Create or convert to a Any Source .Net ODBC data source
Start by creating a Any Source ADO.NET data source.
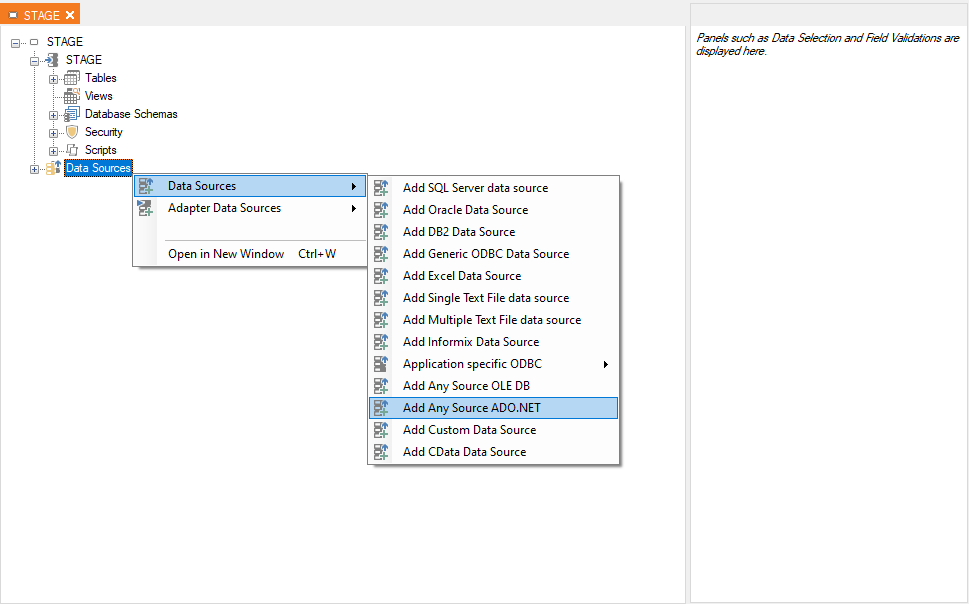
Or converting an existing ODBC data source to an Any Source ADO.NET.
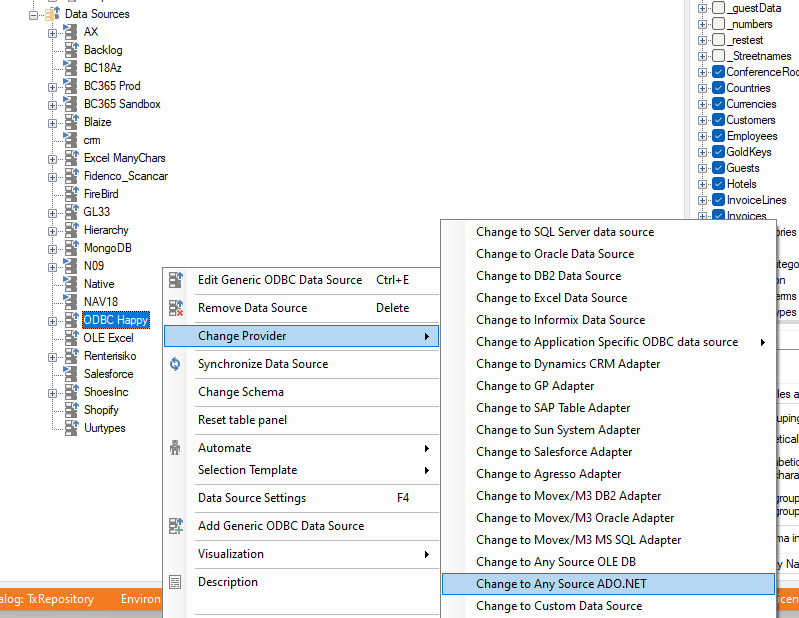
Following this it is the same for both methods, except that the convert method still retains the same name.
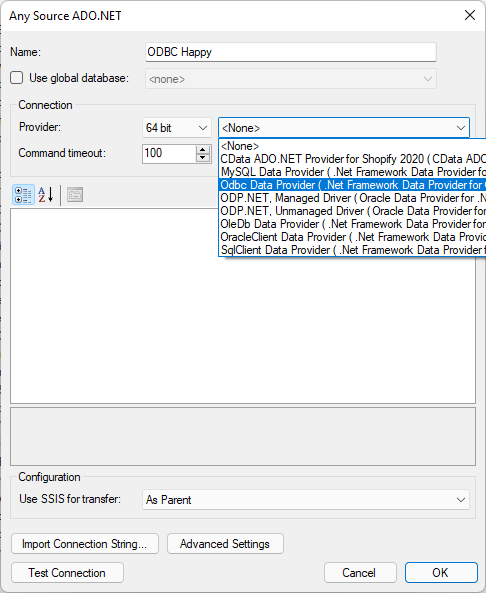
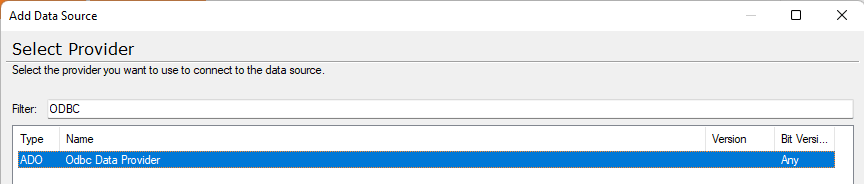
Start by giving the data source a name. Then you locate the ODBC provider.
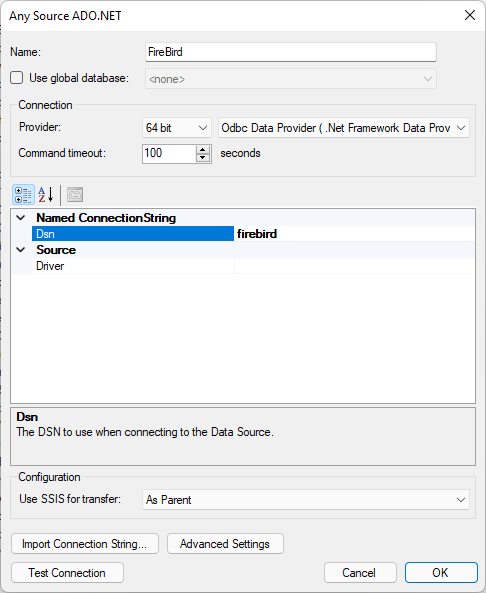
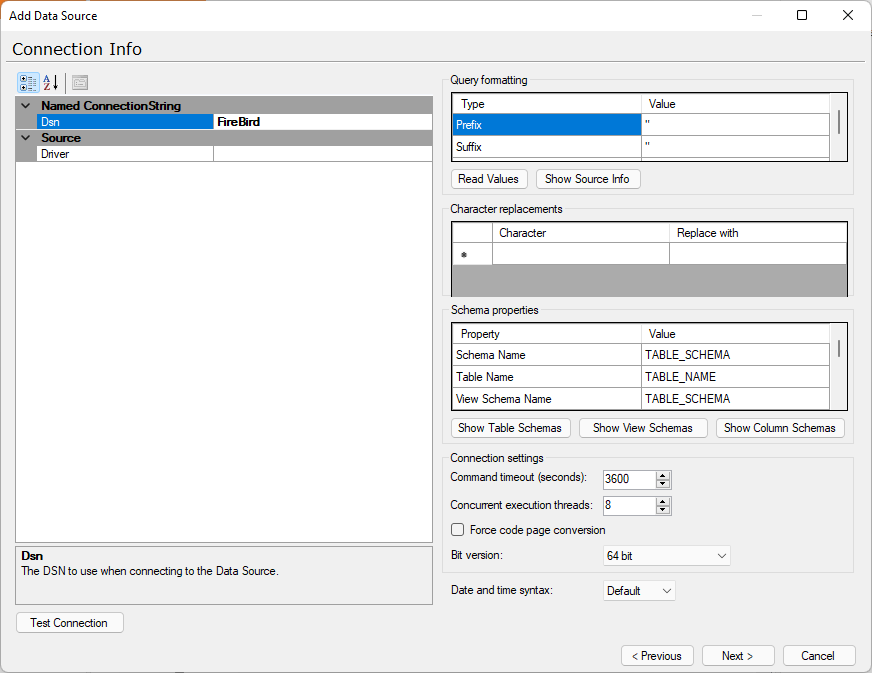
Like you would in a normal ODBC data source you need to add the DSN name in that field.
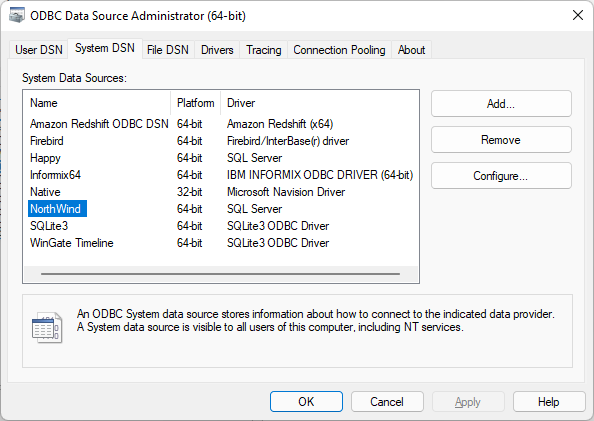
You can see the names in the ODBC Data Source Administrator under System DSN. Be sure what bit version the ODBC is in.
Create a ODX ODBC Data source
Create a new ODX data source, give it names and choose the ODBC provider.
Then you set the DSN name.
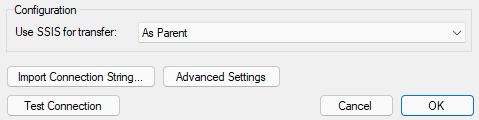
Advanced Settings
This is pretty much the same for all three methods, so no need to show it three times.
Click on the Advanced Settings or locate the right side of the setup.
In here you can set the prefix and postfix, I would keep it as the default value.
BU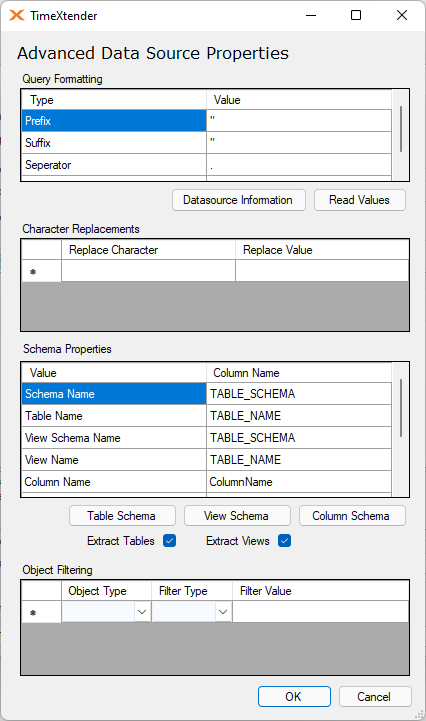
ODX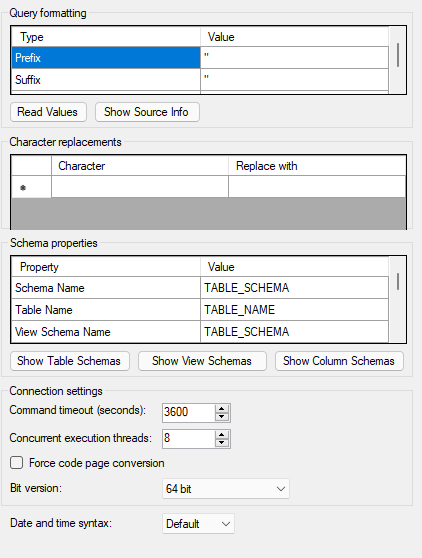
You can click on the Read Values button to see if there is any suggestions to changes.
Then you need to click on the Table Schema button.
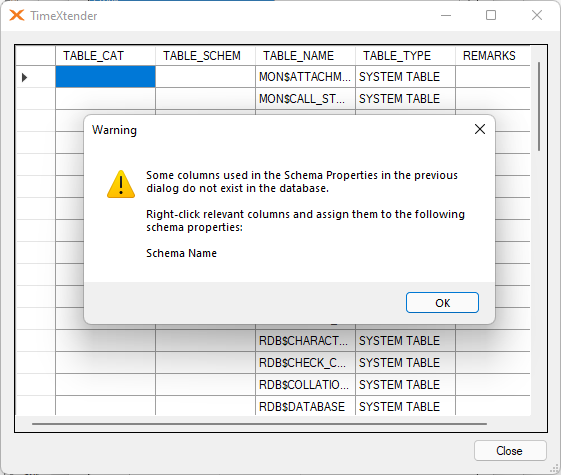
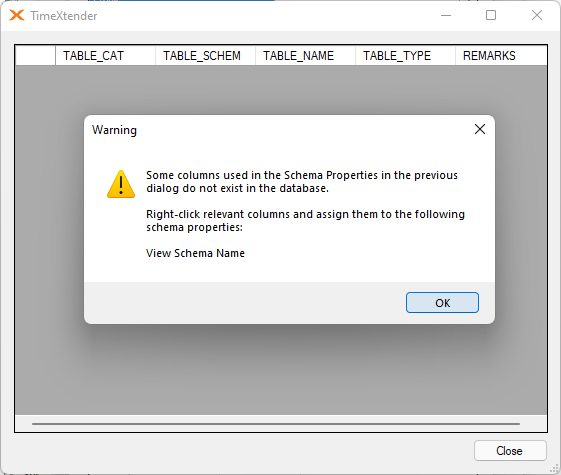
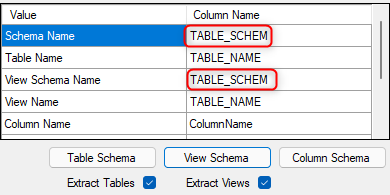
You can just click OK to accept the warning. You need to select a field to become the table schema field. It can be without a schema, but you still need to choose a field to be that. To do so right click on the field you want to use and set it as the schema name.
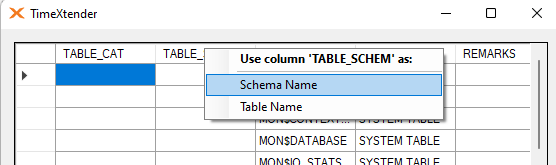
You can also do it for the Table Name if it is not also called the TABLE_NAME in the source.
Once it have been closed you can see the applied change.
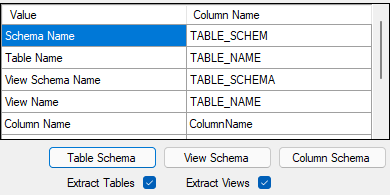
Then you do the same thing, but by clicking on the View Schema button.
It might be empty, as there is not views, but it is still possible to set this up. Again you need to select the table schema field as the View Schema name.
Once these steps have been taken, you will see the column names being changed.
This is usually enough to make it work. You can however do some object filtering in the BU if you do not want to show all tables and in the ODX you can set the date and time syntax to avoid issues these can give.
How to add additional info in the setup
Sometimes it is a requirement that you add some extra connection info to the connection string. It may look like there is a limit to what you can do, but there is not. For example if you needs to add a user and password to gain access you can do it like so.
In a external text document you write the following connection string.

Then you click import connection string and pastes in the string.
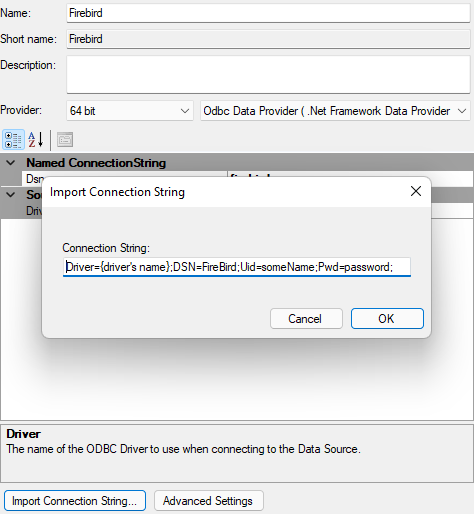
Then you will see how the fields now exists in the setup grid.

0 Comments