Note: There is an updated version of this article, which applies to the next generation of TimeXtender.
Incremental Loading
Incremental loading facilitates faster load times by only loading new data into the data warehouse and staging databases. This is especially useful when the volume of data in the data source causes scheduled execution to take too long.
Automatic Incremental Load from an ODX
To load data incrementally from the ODX data storage and into a data warehouse, you don't have to do anything. Per default, any tables that are incrementally loaded into the ODX will automatically be incrementally loaded into the data warehouse.
Disable Automatic Incremental LOAD
To disable automatic incremental load and force full load for a table
- Right click the table, click Data extraction and select Full load
Enable Handling of Records Deleted in the Source
If records can be deleted from the source system, it can be useful to have them deleted from the data warehouse as well.
To enable delete handling, follow the steps below.
- Right click the table, click Table Settings and click the Data extraction tab.
- Under Incremental load, click on the option that represents how you would like to handle records deleted in the source table. You have the following options:
- Don't handle deletes
- Use hard deletes: Records are deleted in the data warehouse when they are deleted in the source.
- Use soft deletes: Records are marked as deleted in the data warehouse when they are deleted in the source. The value of the system field "IsTombstone" can be used to tell deleted rows from valid rows.
TimeXtender uses the primary key to tell what records have been deleted in the source. This requires the primary key defined in the data warehouse to match the key defined in the ODX when you have delete handling enabled.
To see if a field is part of the primary key in the ODX
- Expand the field in the tree and note if the mapping icon has a key like this:

Warning: If the ODX table does not have a primary key and/or delete handling enabled, delete handling will work, but it will be very slow. On the ODX source table, always set a primary key and enabled delete handling if possible.
How Automatic Incremental Loading Works
The basic logic behind the automation is as follows: The ODX stamps each load from the data source with a batch number. When data is transferred to the data warehouse, the system keeps track of which batches are transferred. Incremental load, then, is simply transferring all batches with a higher batch number than the latest batch transferred to the data warehouse.
Schema Drift Triggers a Full Load
When a new column is added to the table, or a data type is changed, in the source, it will trigger a full load of the table. Since the schema has changed, the new data structure no longer matches the old data.
Delete Handling Triggers Full Load for Tables without Delete Handling Enabled
If you map multiple incrementally loaded tables from the ODX into the same table in the data warehouse, they should all have the same setting for delete handling. Otherwise, the tables without delete handling enabled will be full-loaded.
This means that it can make sense to enable delete handling on the ODX even on tables where records are never deleted. If you do not, a comparatively small Customers table can, for instance, prevent the incremental load of a much larger Invoices table.
Note: This relates to the delete handling setting in the ODX for data extraction from data sources to ODX data storage. The setting for delete handling on tables in the data warehouse applies to delete handling when data is loaded into the data warehouse.
Delete Handling Requires Matching Primary Keys
As stated above, if you enable delete handling, the primary key defined in the data warehouse must match the key defined in the ODX. Otherwise, TimeXtender cannot match the records in the source with the records in the data warehouse to calculate what records to delete.
Source Tables from other Data Warehouses are Ignored
Automatic incremental load does not work with source tables from other data warehouses or staging databases. Incremental load from these tables use the logic described in the Enabling Incremental Loading From Staging Database or Data Warehouse section below, i.e. you have to add an incremental selection rule and explicitly enable incremental load.
Incremental load from Business Unit or data warehouse
Enabling Incremental Loading
To use incremental loading on a table, the table must contain a field that represents new data. This could be an identifier field, an entry number or a date. In addition to that, the table must have a primary key defined.
To include a field in the primary key for the table
-
Right-click a field and click Include in Primary Key.
To enable incremental loading, follow the steps below.
- Right click the table for which you want to enable incremental loading, click Add Incremental Selection Rule, click Yes in the message that appears and go to step 7
- OR -
Right click the table for which you want to enable incremental loading, click Table Settings and continue to step 2. - Click the Data extraction tab and select Incremental load.
- Under Incremental load, click on the option that represents how you would like to handle records deleted in the source table. You have the following options:
- Don't handle deletes
- Use hard deletes
- Use soft deletes
- Click Keep field values up-to-date to recalculate conditional lookup field and supernatural key field values on tables that are already on the data warehouse when the values being looked up have changed.
Note: This option cannot be used when the table is on a Azure Synapse Analytics data warehouse. - If an error icon appears next to the setting, it means that another setting needs to be changed to enable source based incremental loading. Move you mouse over the error icon to see the error message. Once any settings have been changed as required, click OK. The table icon will now be overlaid with an "I" to make it easy for you to identify it as an incrementally loaded table.
- If the table belongs to the staging database, right click the corresponding source table under Data Sources and click Add Incremental Selection Rule.
- OR -
If the table belongs to the data warehouse, right click the table and click Add Incremental Selection Rule.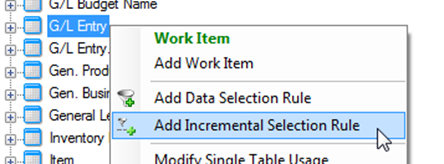
- The Incremental Selection Rules pane appears. Select the fields identifying which records have been added or changed since the last incremental load.
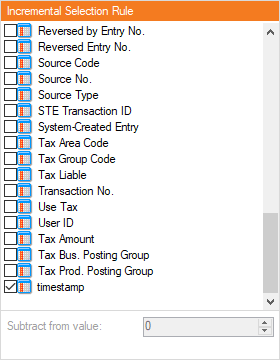
In the Subtract from value, you can enter an integer (from numeric fields) or an amount of time (for date fields) to subtract from the value of the selected field before determining what records are new. This allows you to create an overlap in the records loaded to make sure any recent changes in existing records are reflected in the database.
The fields you choose should ideally be fields that are generated by the system and incremented sequentially when new records are added. Here are some recommended fields for the Microsoft Dynamics ERP systems:- Dynamics Business Central (NAV): timestamp
- Dynamics AX: Modified_Datetime
- Dynamics GP: DEX_ROW_ID
- Repeat steps 1-7 for all tables you want to enable incremental loading on.
- Deploy and execute the table(s). TimeXtender will begin the first full load of the tables with source based incremental loading now enabled. The necessary incremental tables will be automatically added to the staging database and populated with the latest incremental values. The next time the table is executed, TimeXtender will query these tables to determine the last record that was previously loaded and will only extract the data from the data source that was added after the last execution.
Enabling Incremental Loading for Multiple Tables
With the Set Up Incremental Load wizard, you can automate the set-up of incremental load to enable it for a number of tables in one go. You still have to choose primary keys and what fields to use for the incremental load rule, but you selections are applied automatically. In addition to enabling incremental load on the tables you select, any settings that are incompatible with incremental load will also be changed.
Note: When you run the wizard on a data warehouse, additional help will be available in the form of button, Auto Suggest. It will suggest primary keys based on the primary keys set on the staging database. For selection rules, the suggestion depends is a rule based on a custom field created on the table and mapped to the 'DW_TimeStamp' system field of the source table. This rule is displayed in the wizard as 'IncrementalTimeStamp' and has a robot icon.
To use the Set Up Incremental Load wizard, follow the steps below.
- Right click a data source, staging database or data warehouse, click Automate and click Set Up Incremental Load.
- The wizard appears.
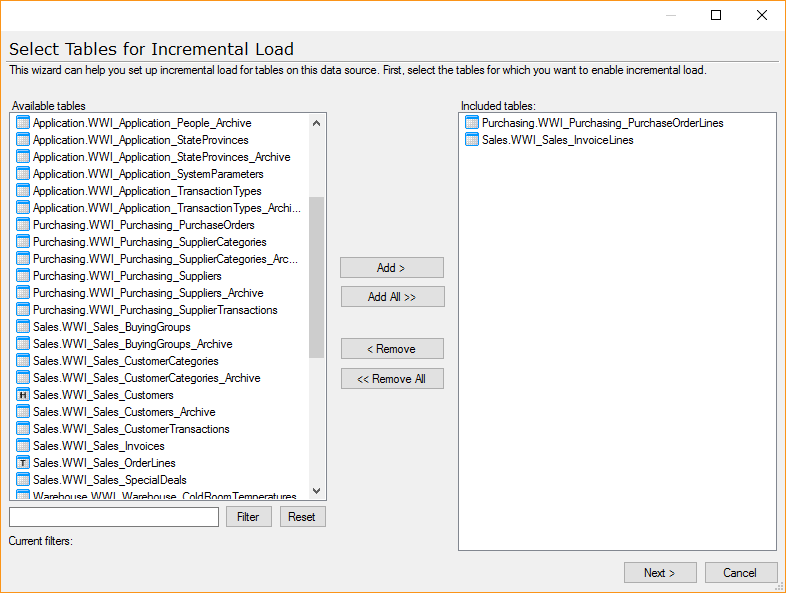
In the Available tables list, double-click the tables you want to enable incremental load for. You can also click a table and then click Add to add an individual table. To add all visible tables, click Add all. Use the filter below the list to filter the list on table name. The following wildcards are supported:- %: Any string of zero or more characters.
- _: Any single character.
- [ ]: Any single character within the specified range ([a-f]) or set ([abcdef]).
- [^]: Any single character not within the specified range ([^a-f]) or set ([^abcdef]).
- Click Next. All incrementally loaded tables need to have a primary key, which you can add on this page. Any tables that do not have a primary key when you proceed to the next page, will be removed from the wizard.
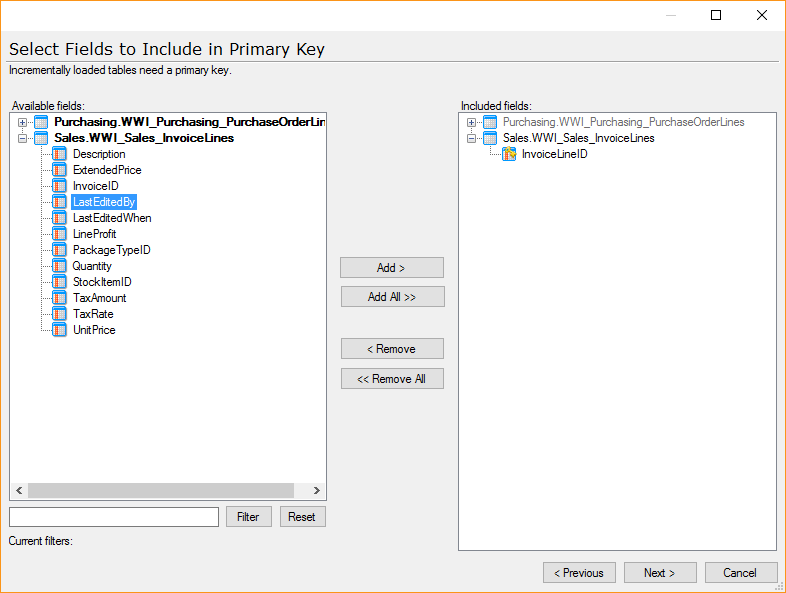
In the Available fields list, double-click the fields you want to use as primary keys on the tables. You can also click a field and then click Add to add an individual field.
The tables in the Available fields list that have at least one primary key field will be shown in bold.
In the Included fields list, any fields that are already primary keys on the tables you selected in the previous step are listed in gray. You cannot remove existing primary keys on this page, only add new ones. - Click Next. All incrementally loaded tables need an incremental selection rule. You select those on this page.
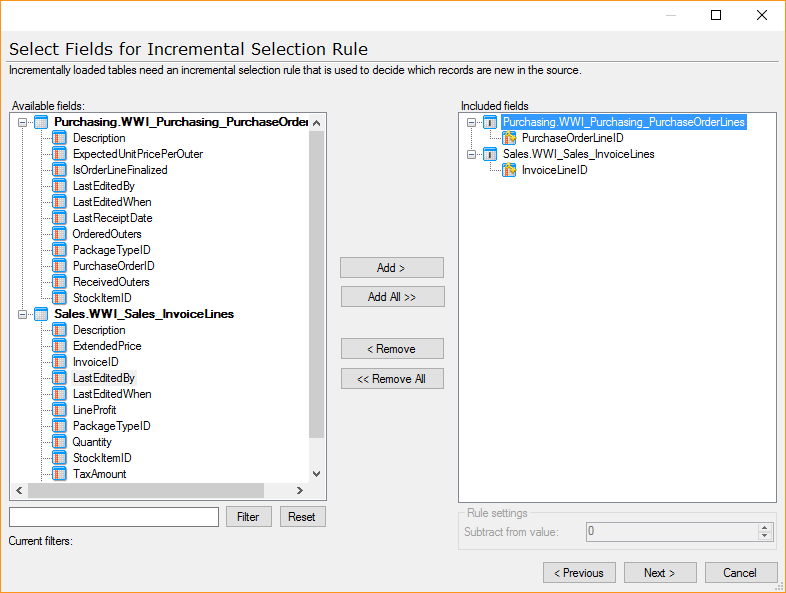
Select the fields you want to use as primary keys on the tables. Under Rule Settings, you can enter a subtraction value for a field if you want the incremental load to overlap the previous load.
The tables in the Available fields list that have a field selected for incremental selection rule will be shown in bold. - Click Next. TimeXtender can handle records deleted in the data source for you. On tables with hard delete enabled, records deleted in the data source is also deleted from the data warehouse.
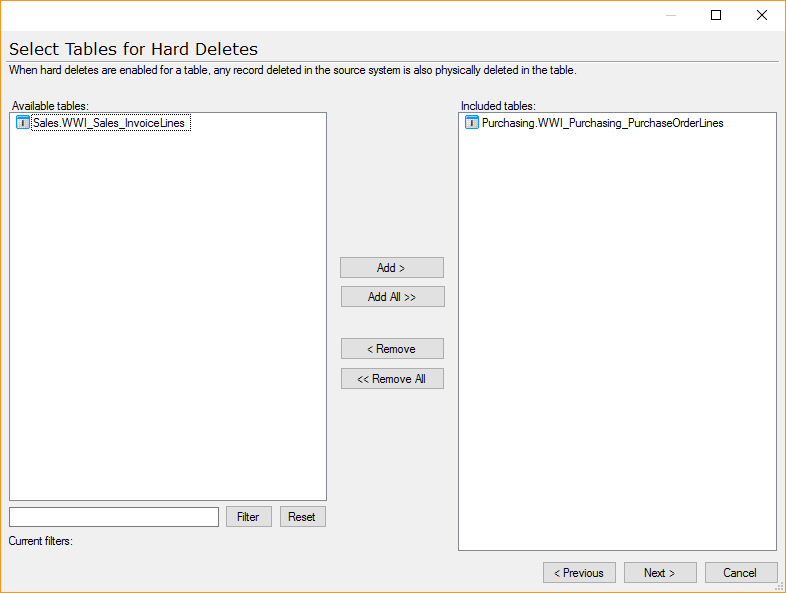
Select the tables you want to enable hard deletes for. - Click Next.
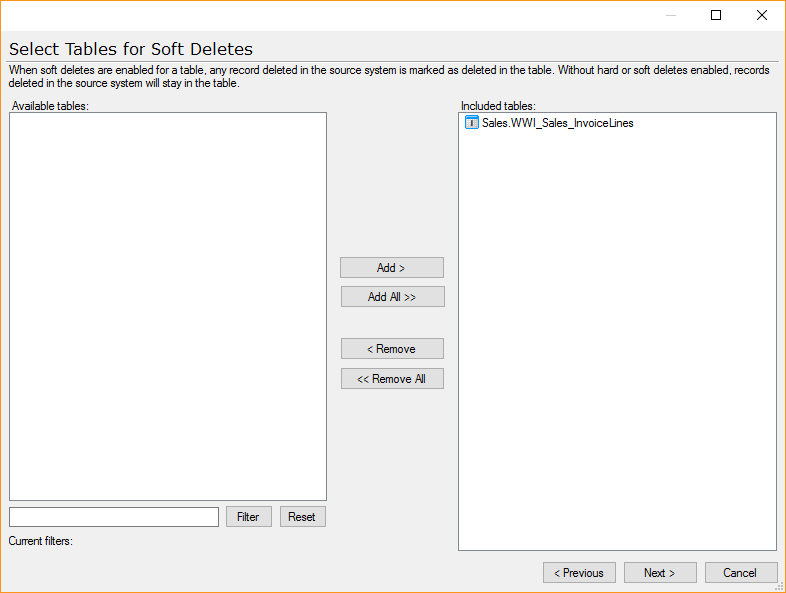
Select tables you want to enable soft deletes for. The tables you do not select for either hard and soft deletes, will not have any delete handling enabled. - Click Next.
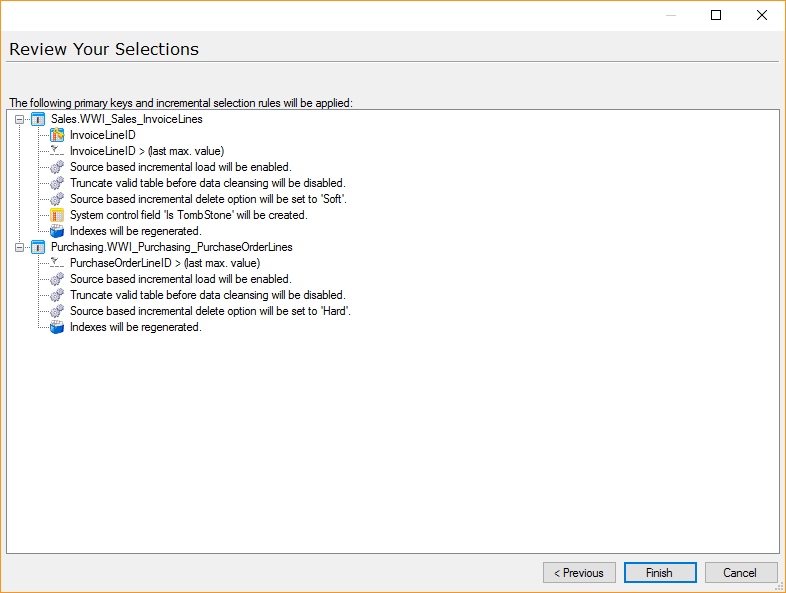
Click Previous to go back to an earlier page and adjust the selections there or click Finish to apply the changes if they are correct.
0 Comments