To create a self-join table in TimeXtender, using Custom Views is the ideal approach, as the data is not duplicated but only referenced. For example, let's imagine we have table that holds all employees, including managers, called etl.People. For simplicity, our example only contains PersonID, Name, Role, and ManagerID.
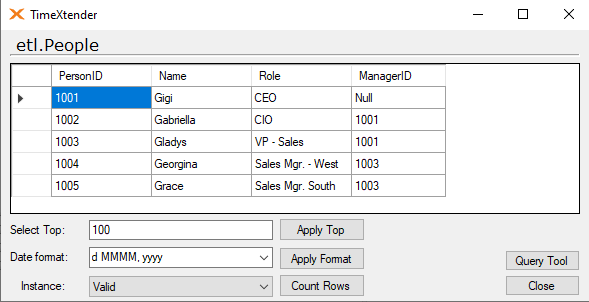
Now, we want to know their manager's name, by adding a field for ManagerName, which is a self-lookup since the Name field already contains the manager's PersonID.

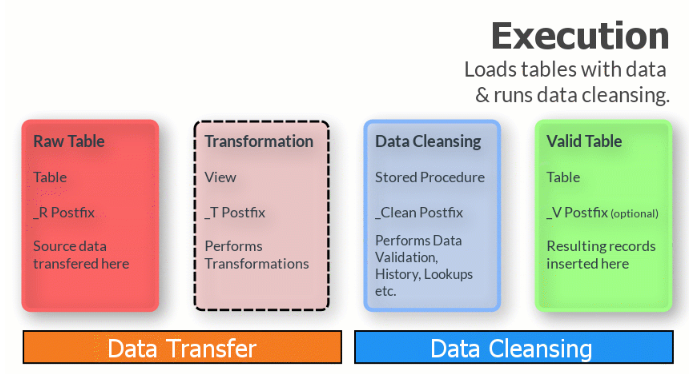
The most important step in the process is to make sure to change the Table the View is referencing the Raw Table. This is due to the order that lookups are executed in the Data Cleansing step before the valid table is executed, (see diagram below). Put differently, the valid table will be empty until the final step, and therefore will not return data. But the raw table containing data from the source, will have the data and allow the view created to provide the lookup data. For more detailed information about the order of Deployment and Execution, please see the section, Foundation: Deployment and Execution, in our free, online Basics course.
Create a Self-Join using Custom Views:
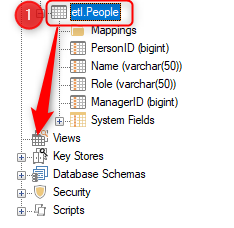
1. Drag the base table in the data warehouse to Views
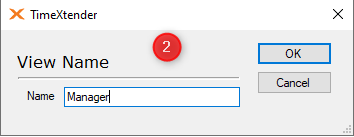
2. Provide a Name for the custom view, and click OK
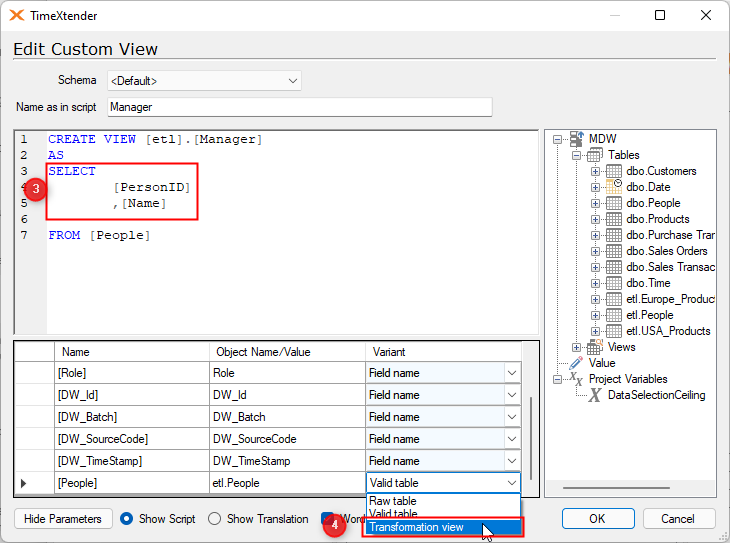
3. Remove any unnecessary fields from the CREATE VIEW script
4. Select Transformation View on the table reference in the parameters section, click OK
5. Click Yes, to remove Unused Parameters

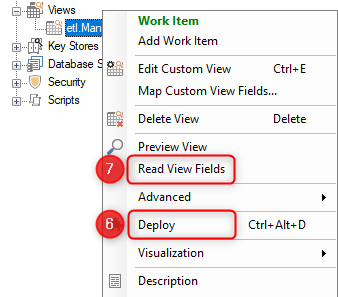
6. Right-click the view, to select Deploy
7. Again, right-click the view, to select Read View Fields
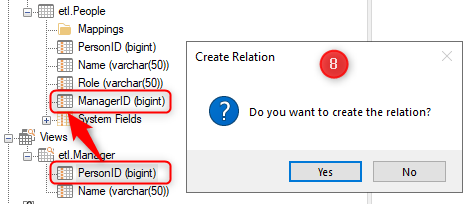
8. Drag the join field from the view to the join field in the table to create the relationship
9. Drag the self-lookup field(s) from the view to the table. Use the defualt relation instead of joins, when prompted.
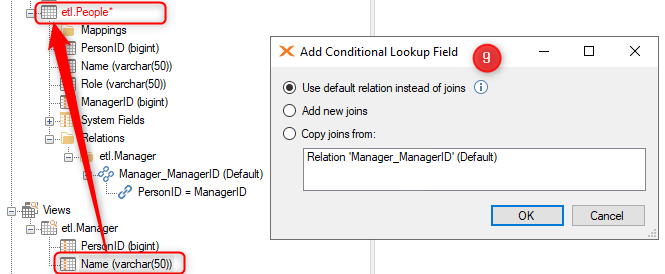
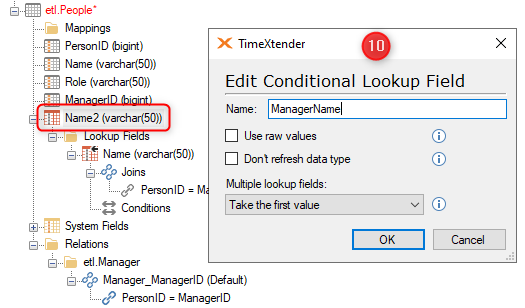
10. Right-click the self-lookup field and select Edit Conditional Lookup Field to rename it
11. Deploy and Execute the table, making sure to uncheck Enable Managed Deployment to avoid an error in the execution process
12. Select Preview Table by right-clicking the table to see the data lookup populated

Success! Now, we can see our self-join lookup field is populated without duplicating any data.

0 Comments