Note: This is an old article. However, some tips may still apply to newer versions.
Introduction
A parent-child dimension is based on two dimension table columns that together define the lineage relationships among the members of the dimension. One column, called the member key column, identifies each member; the other column, called the parent key column, identifies the parent of each member.
Example
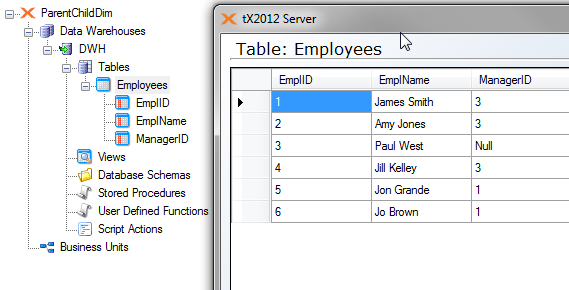
This is an example of a employee table that is well suited for a parent-child example:

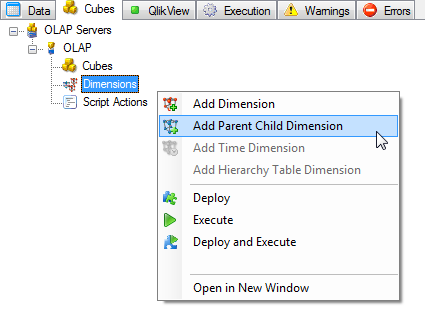
To build a parent-child dimension, select Add Parent Child Dimension on the Dimension node on the Cubes tab:

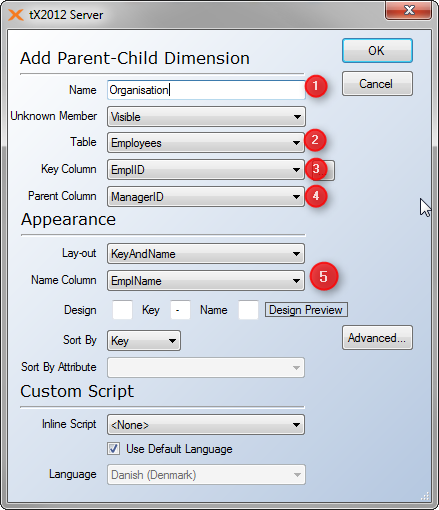
Setup the parent child dimension properties:

- Name of the parent child dimension
- The Data Warehouse table that contains the data
- The Member key column
- The Parent key column
- The appearance.
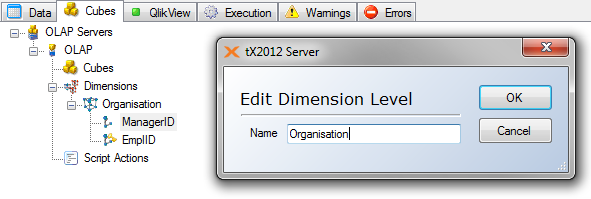
The dimension will be created with two "levels". The Member Key level and the Parent Key level.
Since the Parent Key level contains the actual parent-child structure, it is recommended to rename this to the same name as the parent child dimension:

Deploy and execute, and you have a parent-child dimension.
This article applies to: tX2012, TX2014. Last updated: 2014-04-01.
0 Comments