Often you will be in the situation where you want to enrich a table with more fields.
Normally you would add a ConditionalLookupField from one table to the other. This can only be Top, Sum, Average, Count, Minimum and Maximum. In most cases this is fine, as you only want that.
In this case however, you want to split the table out in more lines than there is. Commonly you would do this with a LEFT OUTER JOIN.
This is where the use of a custom view comes in handy.
How to create a custom view
You start by right clicking on the Views icon.
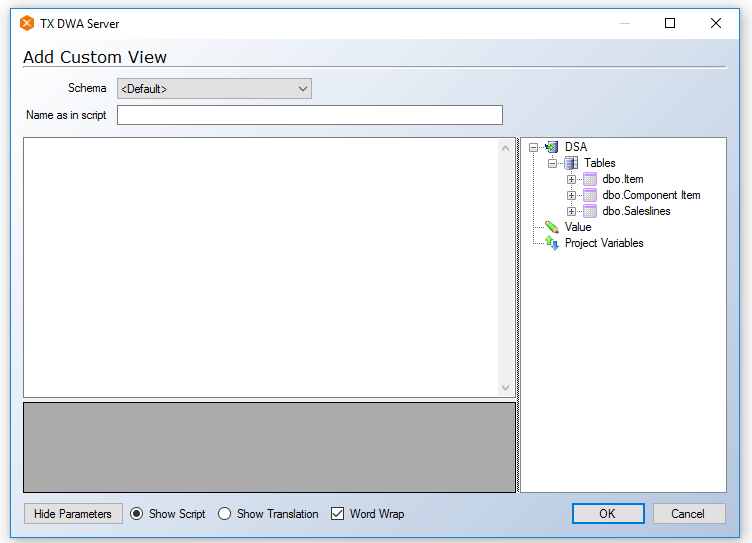
Then you choose Add custom View and you will be presented with this.

In the right side there is the current tables, views and project variables that can be dragged in to the script. In the bottom you got the names, object values and variants. Lastly there is the show translation switch that shows you the code that are sent against the SQL server.
The issue
Say you want to split an item out in its component parts and the sales of this across each component item.
You have a salesline table with all the item sales. A component item table that shows the primary item and the component item. Lastly also the Item table that contains the price of each item.
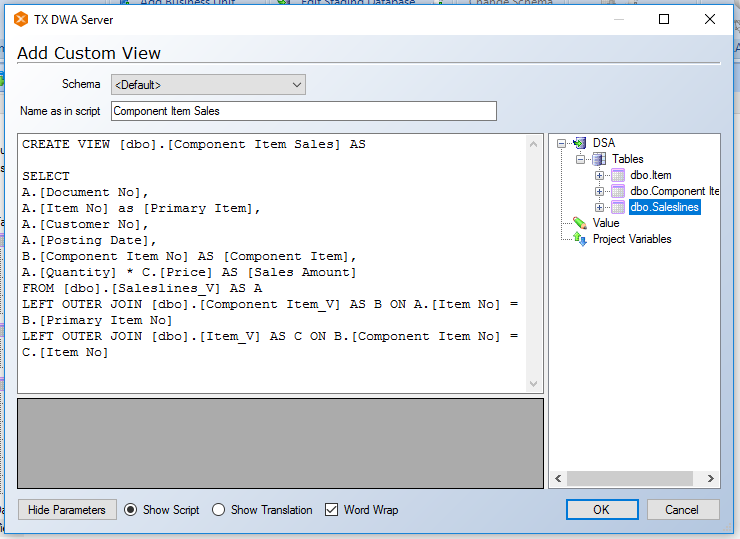
The script would look like this.
CREATE VIEW [dbo].[Component Item Sales] AS

SELECT
A.[Document No],
A.[Item No] as [Primary Item],
A.[Customer No],
A.[Posting Date],
B.[Component Item No] AS [Component Item],
A.[Quantity] * C.[Price] AS [Sales Amount]
FROM [dbo].[Saleslines_V] AS A
LEFT OUTER JOIN [dbo].[Component Item_V] AS B ON A.[Item No] = B.[Primary Item No]
LEFT OUTER JOIN [dbo].[Item_V] AS C ON B.[Component Item No] = C.[Item No]
This would split out the amount on the various component items. Off course in the real world the price is not a fixed amount, but change many times.
Adding it to the custom view
Normally you would create it outside TimeXtender, to do the necessary testing. So start by copying the code and pasting it in the view.

It has to have the same name as stated in the first line of code. So if it is not called "Component Item Sales" there you will get an error.
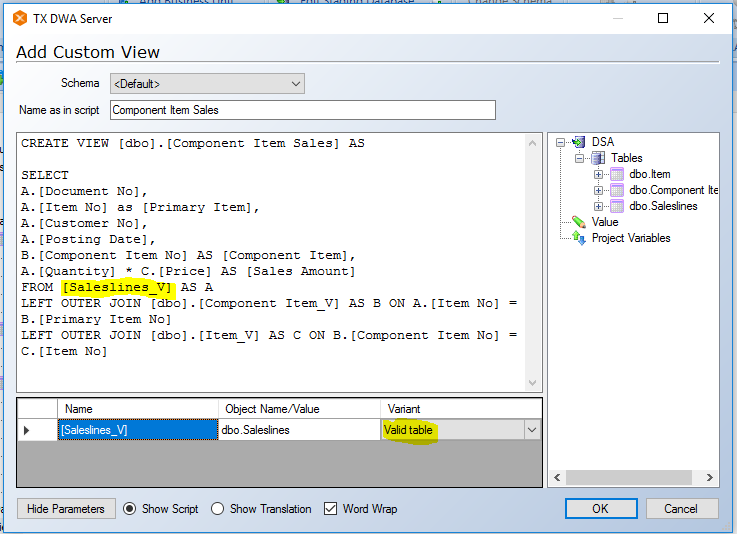
The next step is to make it dynamic. Find the fields and tables in the right side of the view creator and pull them in.
I always change the name to end with _V if it is a valid table and _R if it is a raw table.

See how it changes when you show the Translation.
This makes it easy to copy back and forth between SQL management studio and this, without you having to change anything in the script.
Then you just pull in the rest of the fields and tables.
It is a good idea to preview the translation before you deploy it, as naming errors are shown below the script in the Show Translation view.
Then you Deploy the view we just created.
And right click on the view and choose Read View Fields.
0 Comments