Business Units and Staging Databases
Note: If you use the ODX Server, data will be copied directly from the ODX Server to a data warehouse. For this reason, you won't be using business units and you can safely skip this section.
In TimeXtender, a business unit is any part of your organization that you want to treat as a separate entity in your project. For example, you may want to treat a company headquarters and each of its subsidiaries as separate business units.
Each business unit in your project has a staging database and a number of data sources.
The staging database can be stored on SQL Server or on Azure SQL Database. It stores the data selected for extraction from the data sources. Additionally, many of the validation and transformation processes take place in the staging database. This ensures that the cleansing process has limited impact on the transaction database.
The difference between a staging database and a data warehouse is minimal. You can add custom tables, views, scripts, table relationships, security to a staging database just as if it was a data warehouse database.
Adding a Business Unit
To add a new business unit, follow the steps below:
- In the Solution Explorer, right-click Business Units, and click Add Business Unit. The Add Business Unit window appears.

- Type a name for the business unit and click OK. The Staging Database window appears. This window is similar to the window you see when you add a data warehouse. See Adding a Data Warehouse for more information on the different options.
Adding an External Business Unit
You can add business units from other projects to your project. This enables reuse of business units across different projects. To add an external business unit, follow the steps below:
- In the Solution Explorer, right-click Business Units, and then click Add External Business Unit. The Add Business Unit window appears.
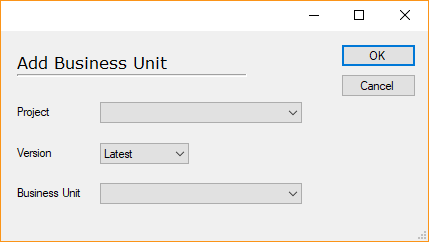
- In the Project list, select the project that contains the business unit you want to add.
- In the Version list, click on the version of the business unit you want to import. You have the following options:
- Latest: Adds the last saved version of the project, which does not always correspond to the last deployed version
- Deployed: Adds the last deployed version of the project
- In the Business Unit list, click on the business unit you want to add, and then click OK.
- Click either By ID to synchronize fields by ID or By Name to synchronize fields by name. The business unit is added and listed in the Solution Explorer.
If you make changes to the external business unit in its "own" project, you can synchronize the changes to your project.
To synchronize an external business unit
- Right click the external business unit click Synchronize and click either By ID to synchronize fields by ID or By Name to synchronize fields by name.
Enabling Simple Mode for a Business Unit
Simple mode is a setting on tables on business units aimed at maximizing performance when you need to copy large amounts of data into a staging database to create an exact copy. See Simple Mode for more information.
Simple mode can be enabled on the business unit level for all data source and tables on the business unit. It can be overridden on the data source level or on individual tables.
To enable simple mode for a business unit
- Right click on the business unit, click Business Unit Settings and select Enable Simple Mode.
0 Comments