Data Export
The nature of a data warehouse is to be a means to an end, for instance getting up-to-date sales numbers every morning or the data needed for financial reporting.
TimeXtender supports these scenarios through SSAS Multidimensional cubes or data visualization tools such as QlikView or Qlik Sense. Through the Data Export feature, however, you also have the ability to push parts of - or the entire data warehouse - to another destination, such as an Oracle database or text files.
The feature uses the same external provider concept as the custom data source, which means that we have a framework that makes it possible to add new providers without releasing a new version of TimeXtender.
For each type of destination, you will need a data export provider that can be downloaded and installed through the Custom Component Setup application. Please see the support site for more information: https://legacysupport.timextender.com/hc/en-us/articles/209604866
At the time of writing, the following data export destinations are supported:
- Oracle
- SQL Server
- Text files
A data export, or data export destination, and the tables and fields it contains, supports a subset of the features found on regular data warehouses.
Table features:
- Selection rules
- Guard table
- Preview table and the query tool
- Tracing
- Pre- and postscripts
- Description
Field features:
- Include in primary key
- Edit name and data type
- Tracing
- Description
Adding a New Data Export
To add a new data export, follow the steps below.
- In the Solution Explorer, right click Semantic Layer and click Add Data Export.
- In Name, type a name for the data export destination.
- In the Provider list, click the provider you want to use.
- In the Setup Property list, click Setup Properties. In the grid below, enter the setup properties required by the selected data export destination.
- (Optional) Click Test connection to test that the connection properties you entered allow you to connect.
Adding a Table to a Data Export
To add a table to a data export, follow the steps below.
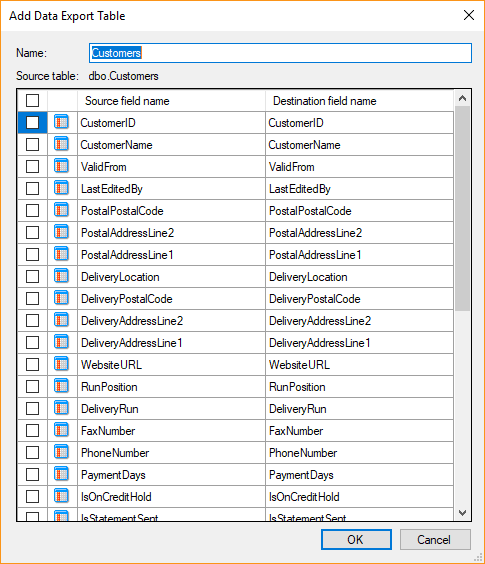
- Drag the table from a data warehouse to Tables under the relevant data export. The Add Data Export Table window opens.

- (Optional) In Data Export Table Name type a name for the table when used in the data export.
- Clear the selection for fields you do not want to include in the table on the data export. Click a name in the Destination Name to edit the name as it appears on the Data Export.
- Click OK.
Adding All Tables and/or Views from a Data Warehouse to a Data Export
To add all tables and/or views from a data warehouse to a data export
- Drag Tables or Views under a data warehouse – or the entire data warehouse – to the relevant data export.
TimeXtender will add all views and all tables with all fields to the data export with the following exceptions:
- Tables or views that have already been added to the data export will be ignored.
- Tables or views that are not visible on the data warehouse in the currently selected project perspective will not be added.
- Tables or views that are not visible on the data export in the currently selected perspective, will be ignored if you add them again.
Previewing a Table
Once the data export has been executed, the regular Preview Table command can be used to view the content of the table.
Click on Destination in the Instance list to see the data stored in the data export and Source to view the data in the table in the data warehouse.
1 Comments